Introduction
Our family needs a security camera because we want to see how our dog is doing during the day when we’re not home. Building a security camera using a Raspberry Pi + camera module is affordable and will enable us to see a live video of our dog on our phones.
Google search using the terms “security camera raspberry pi” show this is a very popular engineering project and there are several tutorials and blog posts on building such a security camera. The Hackster io Smart Security Camera Info offered the best tutorial in achieving the objective of seeing a live video of our dog on our phones by building a security camera using a Raspberry Pi.
The report includes:
- Abstract: A short summary of the report
- Materials: List of the materials used for building the security camera system
- Procedure: Step-by-step details of the design and testing of the system to complete the project
- Test & Improve: If any improvements/enhancements to be made to the system
- Obstacles: Challenges encountered during the process
- Results: Demo of final output
- Conclusion: Summary of the report
- Acknowledgments
- References
Abstract
Purpose: Our dog can sometimes get into trouble at home, especially when he is alone, and we wanted to figure an affordable way to keep tabs on him when we are away during the day. Making a security camera that outputs a live video stream of our dog at home, which we can watch from our phones at a secure web address is therefore the goal of this project.
Procedure: Using online instructions, assemble and configure the Raspberry Pi and the camera module, downloaded and modify the openCV software that detects objects in the video feed, and download/clone the Smart-Security-Camera project from github. Finally, run the python program python main.py at the terminal, which outputs the live video stream. View the live video stream using the ip address of the raspberry pi; the ability to view this live video stream on a device with internet connectivity is the design criteria for the project.
Results: The assembly and configuration of the Raspberry Pi and Camera went smoothly; I was able to quickly test the camera using the raspistill -o image.jpg command in the terminal. Key challenges I encountered included installing/configuring the open source software, openCV, and configuring a secure port to monitor the video stream on a different network other than my raspberry pi. With the help of online resources/comments section of the online tutorial, the challenges were resolved. The live video stream of our dog can be viewed by visiting the ip address of my raspberry pi in the browser.
Conclusion: The product built using “Raspberry Pi + Camera module + OpenCV/smart-security-camera software”" successfully met the design criteria for this engineering project, which is the ability to view a live video stream of our dog by visiting the ip address of my raspberry pi in the browser, or if in a different network other than my raspberry pi via the ./ngrok http 5000 site.
Materials
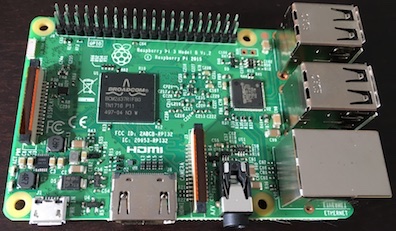
- Raspberry Pi3
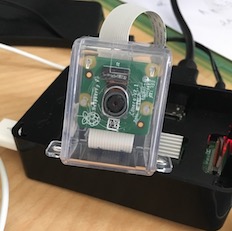
- Raspberry Pi Camera module
- Camera cable
- MicroUSB power supply
- Micro SD card
- HDMI to HDMI Cable
- USB to USB cable
Procedure
- Follow online directions to assemble Raspberry Pi and camera: Raspberry Pi assembly directions
- Load operating system. I had a preloaded microSD card with NOOBS.
- Connect to monitor to see if running correctly at this point
- Connect to WiFi
- Open the terminal and run the unix command to enable the camera
sudo raspi-config- Now we verify that the camera works by running the command
raspistill -o prince.jpg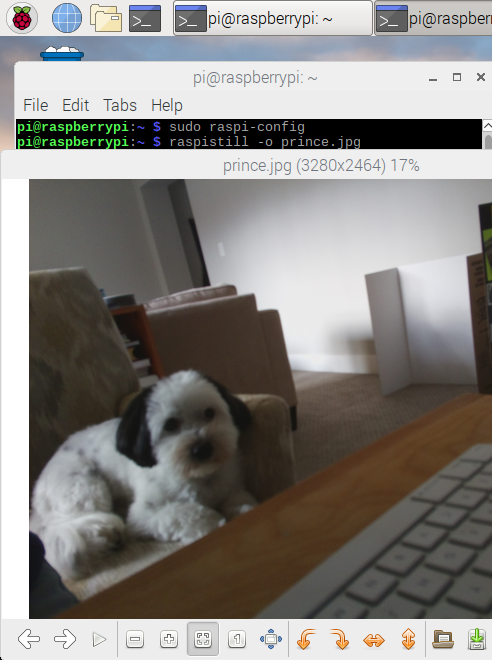
Prince
- Install openCV by using this tutorial. A few of the unix commands shown for the install. Please follow tutorial for exact steps.
#install dependencies step #2 per the online tutorial
$ sudo apt-get update
$ sudo apt-get upgrade

#After installing dependencies step #2 per the online tutorial, install the openCV sofware
cd ~
$ wget -O opencv.zip https://github.com/Itseez/opencv/archive/3.1.0.zip
$ unzip opencv.zip

$ wget -O opencv_contrib.zip https://github.com/Itseez/opencv_contrib/archive/3.1.0.zip
$ unzip opencv_contrib.zip- Modify configuration files per online instructions (with parents’ help)
- Clone Smart-Security-Camera project from git
source ~/.profile
workon cv
cd Smart-Security-Camera- Configure mail.py and main.py in the Smart-Security-Camera directory using the ‘pico’ text editor or other editor of your choice. In the mail.py file (using Python 3.5) use the following:
from email.mime.multipart import MIMEMultipart
from email.mime.text import MIMEText
from email.mime.image import MIMEImage
-D ENABLE_PRECOMPILED_HEADERS=OFF
pip install -r requirements.txt
# Email you want to send the update from (only works with gmail)
fromEmail = 'myemail@gmail.com'
fromEmailPassword = 'password1234'
# Email you want to send the update to
toEmail = 'anotheremail@gmail.com'
email_update_interval = 600 # sends an email only once in this time interval
video_camera = VideoCamera(flip=True) # creates a camera object, flip vertically
object_classifier = cv2.CascadeClassifier("models/fullbody_recognition_model.xml") # an opencv classifier- Run the program with the following command:
python main.pyView the live video stream by visiting the ip address of my pi in a browser. Find the ip address of the pi using the
ifconfigcommand and look for the inet address. Visit<raspberrypi_ip>:5000in the browser to view the stream.To view the live stream on a different network other than the pi, an account is needed with ngrok (My parents helped with this part).
Test & Improve
- Take extra care when inserting the camera module cable into the Raspberry Pi.
- Update online instructions for installing openCV software with all relevant fixes/updates.
Obstacles
- Installing/configuring the open source software, openCV
- Configuring a secure port to monitor the video stream on a different network other than my raspberry pi.
Future Applications
- Music on Raspberry Pi using Sonic P
- Photo Booth using Raspberry Pi
- Portable Digital eBook Library
Results
- Live Demo of the video Stream
Conclusion
The product built using “Raspberry Pi + Camera module + OpenCV/smart-security-camera software”" successfully met the design criteria for this engineering project, which is the ability to view a live video stream of our dog by visiting the ip address of my raspberry pi in the browser, or if in a different network other than my raspberry pi via the ./ngrok http 5000 site.
Acknowledgements
- My parents, a family friend and my dog

Nubu
References
- Project: Getting Started with The Raspberry Pi. Retrieved from “https://projects.raspberrypi.org/en/projects/raspberry-pi-getting-started” Raspberry Pi Project Page
- How to understand Security Camera Systems. Retrieved from “https://www.wikihow.com/Understand-Security-Camera-Systems” Understanding Security Camera Systems
- Smart Security Camera. Retrieved from “https://www.hackster.io/hackerhouse/smart-security-camera-90d7bd” Hackster io Smart Security Camera Info